
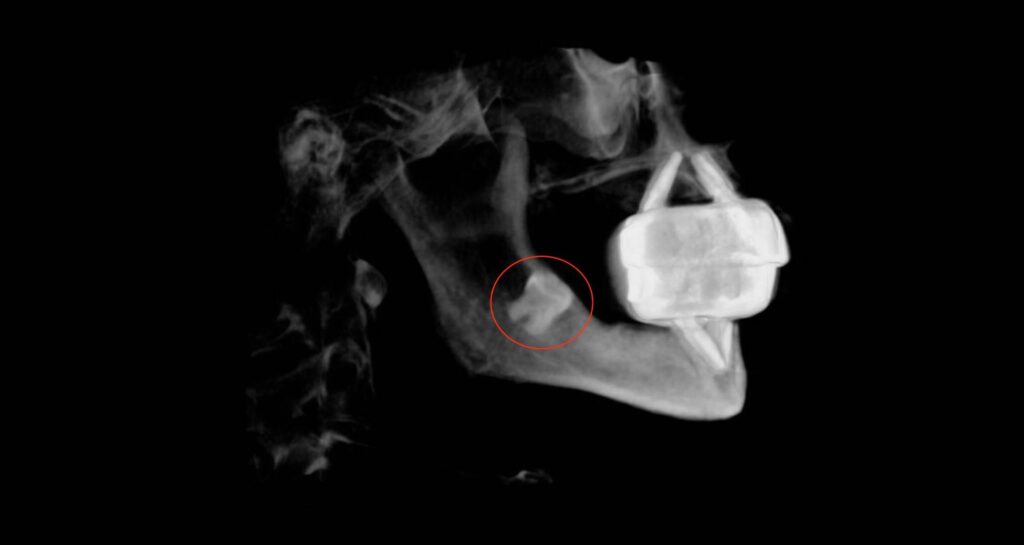
I love seeing my full-arch patients present with third molars intact (cue the sarcasm)…
Least favorite of all, are those pesky mandibular third molars. Partially impacted. Kind of in the way. Kind of not. Atrophic jaw. Multiple medical comorbidities. The list goes on…
As a private practice surgeon – I loved wisdom teeth. I craved them.
As an AOX surgeon – I can’t stand them.
And, as my experience has grown and I have seen my own firsthand third molar full-arch complications – I have changed how I approach these teeth during AOX surgery. To be blunt, I have become much, much more conservative.
Given an elderly patient population with multiple medical comorbidities, removal of third molars can carry some significant risks. And furthermore, the majority of these patients are usually asymptomatic. It’s all their “other” teeth that bother them.
Given this somewhat unique scenario we are often presented with in full-arch surgery, our decision process relative to third molar treatment can sometimes be a little murky.
Today, I wanted to share how I currently manage mandibular third molars in the setting of full-arch surgery. Keep in mind that this is a “simplified” outline. Each individual patient’s presentation, anatomy, and medical history is ultimately taken into account to formulate a final decision.
Mandibular Third Molar Management:
1. Symptomatic or Gross Decay: Extract.
2. Erupted: Extract.
3. Soft Tissue Impacted or Partially Impacted:
*If no risk of inferior alveolar nerve damage, I will typically extract these teeth.
However, if the patient’s medical history includes a comorbidity or medication that may impair their ability to heal – I will opt to be more conservative and monitor these teeth.
4. Soft Tissue Impacted or Partially Impacted:
*If risk of damage to the inferior alveolar nerve exists, I will monitor these teeth (in the absence of significant decay). If there is significant decay (but no infection) I will consider a coronectomy.
If teeth are left to be monitored, I will ensure that the posterior reduction is adequate, but also that the reduction does not impinge on the third molar region.
5. Full Bony Impacted: Monitor.
I almost never remove a completely impacted mandibular third molar. In my opinion the risks simply outweigh the benefits for most full-arch patients. (This is of course assuming the patient is asymptomatic – which the vast majority of patients are when presenting later in life with a true complete impaction).
Even as an OMFS, I have learned to treat third molars in the full-arch population with the utmost respect, patience, and wisdom. There are times when decisive surgical action is required. And yet, there are many times when the best course of action, is no surgical intervention at all.
Here’s to third molar wisdom.
Matthew Krieger DMD
“Discretion is the better part of valor.”
William Shakespeare
Q & A with Dr. K
“You say you take out teeth first – before making an incision. So, when do you take out teeth that are impacted?” |
Obviously, an incision is necessary prior to removing impacted teeth.
However, in these scenarios I still take out all the erupted teeth in the arch first.
I then make my incision, remove papilla, and reflect the flap.
At this point I remove the impacted tooth/teeth.
While it is likely more efficient in this particular scenario to make your incision, reflect your flap, and then remove all the teeth at once – I still feel the plethora of benefits from the Teeth First / Incision Second technique outweighs any improved efficiency you might gain.