

If you’ve done enough All-On-X cases you know that quite possibly the worst, gut wrenching feeling you can get is realizing post operatively that reduction was inadequate.
This leads to a host of problems such as a thin prosthetic prone to fracture, having to unnecessarily open VDO, lip incompetence, and the dreaded visible transition line of the prosthesis.
I have written an article you can access here, on “The Best Way to Confirm Your Alveolar Reduction is On Point” for both the maxilla and mandible.
This assumes of course the reduction is planned. Which, let’s be clear, it always should be planned pre-operatively. Preferably, by the restorative provider who will manage the prosthetic.
However, there are times when the following scenarios may occur:
- You have carried out the pre-op planned reduction measurements, but intra-operatively things seem off and the pre-op VDO is not accurate with the intra-op VDO.
- You have received a patient as a referral from a restorative provider who should have completed a pre-op assessment of smile line, VDO etc but they forgot to include reduction numbers.
- You have spent a lot of time and money creating a digital reduction guide…and now the guide doesn’t seem to fit intra-operatively.
In these scenarios, as sweat starts to show through your surgeon’s cap, you try to keep your cool. You’re wondering how in the heck you’re going to ensure you have enough reduction for this case without reduction numbers or your fancy guide…
Thankfully for you, the mandible has provided all surgeons a pre-made, built in, free mandibular reduction guide. And get this…it’s even applicable to edentulous cases!
You can relax and dry off your surgeon’s cap as you set aside your $1000 reduction guide that doesn’t fit very well.
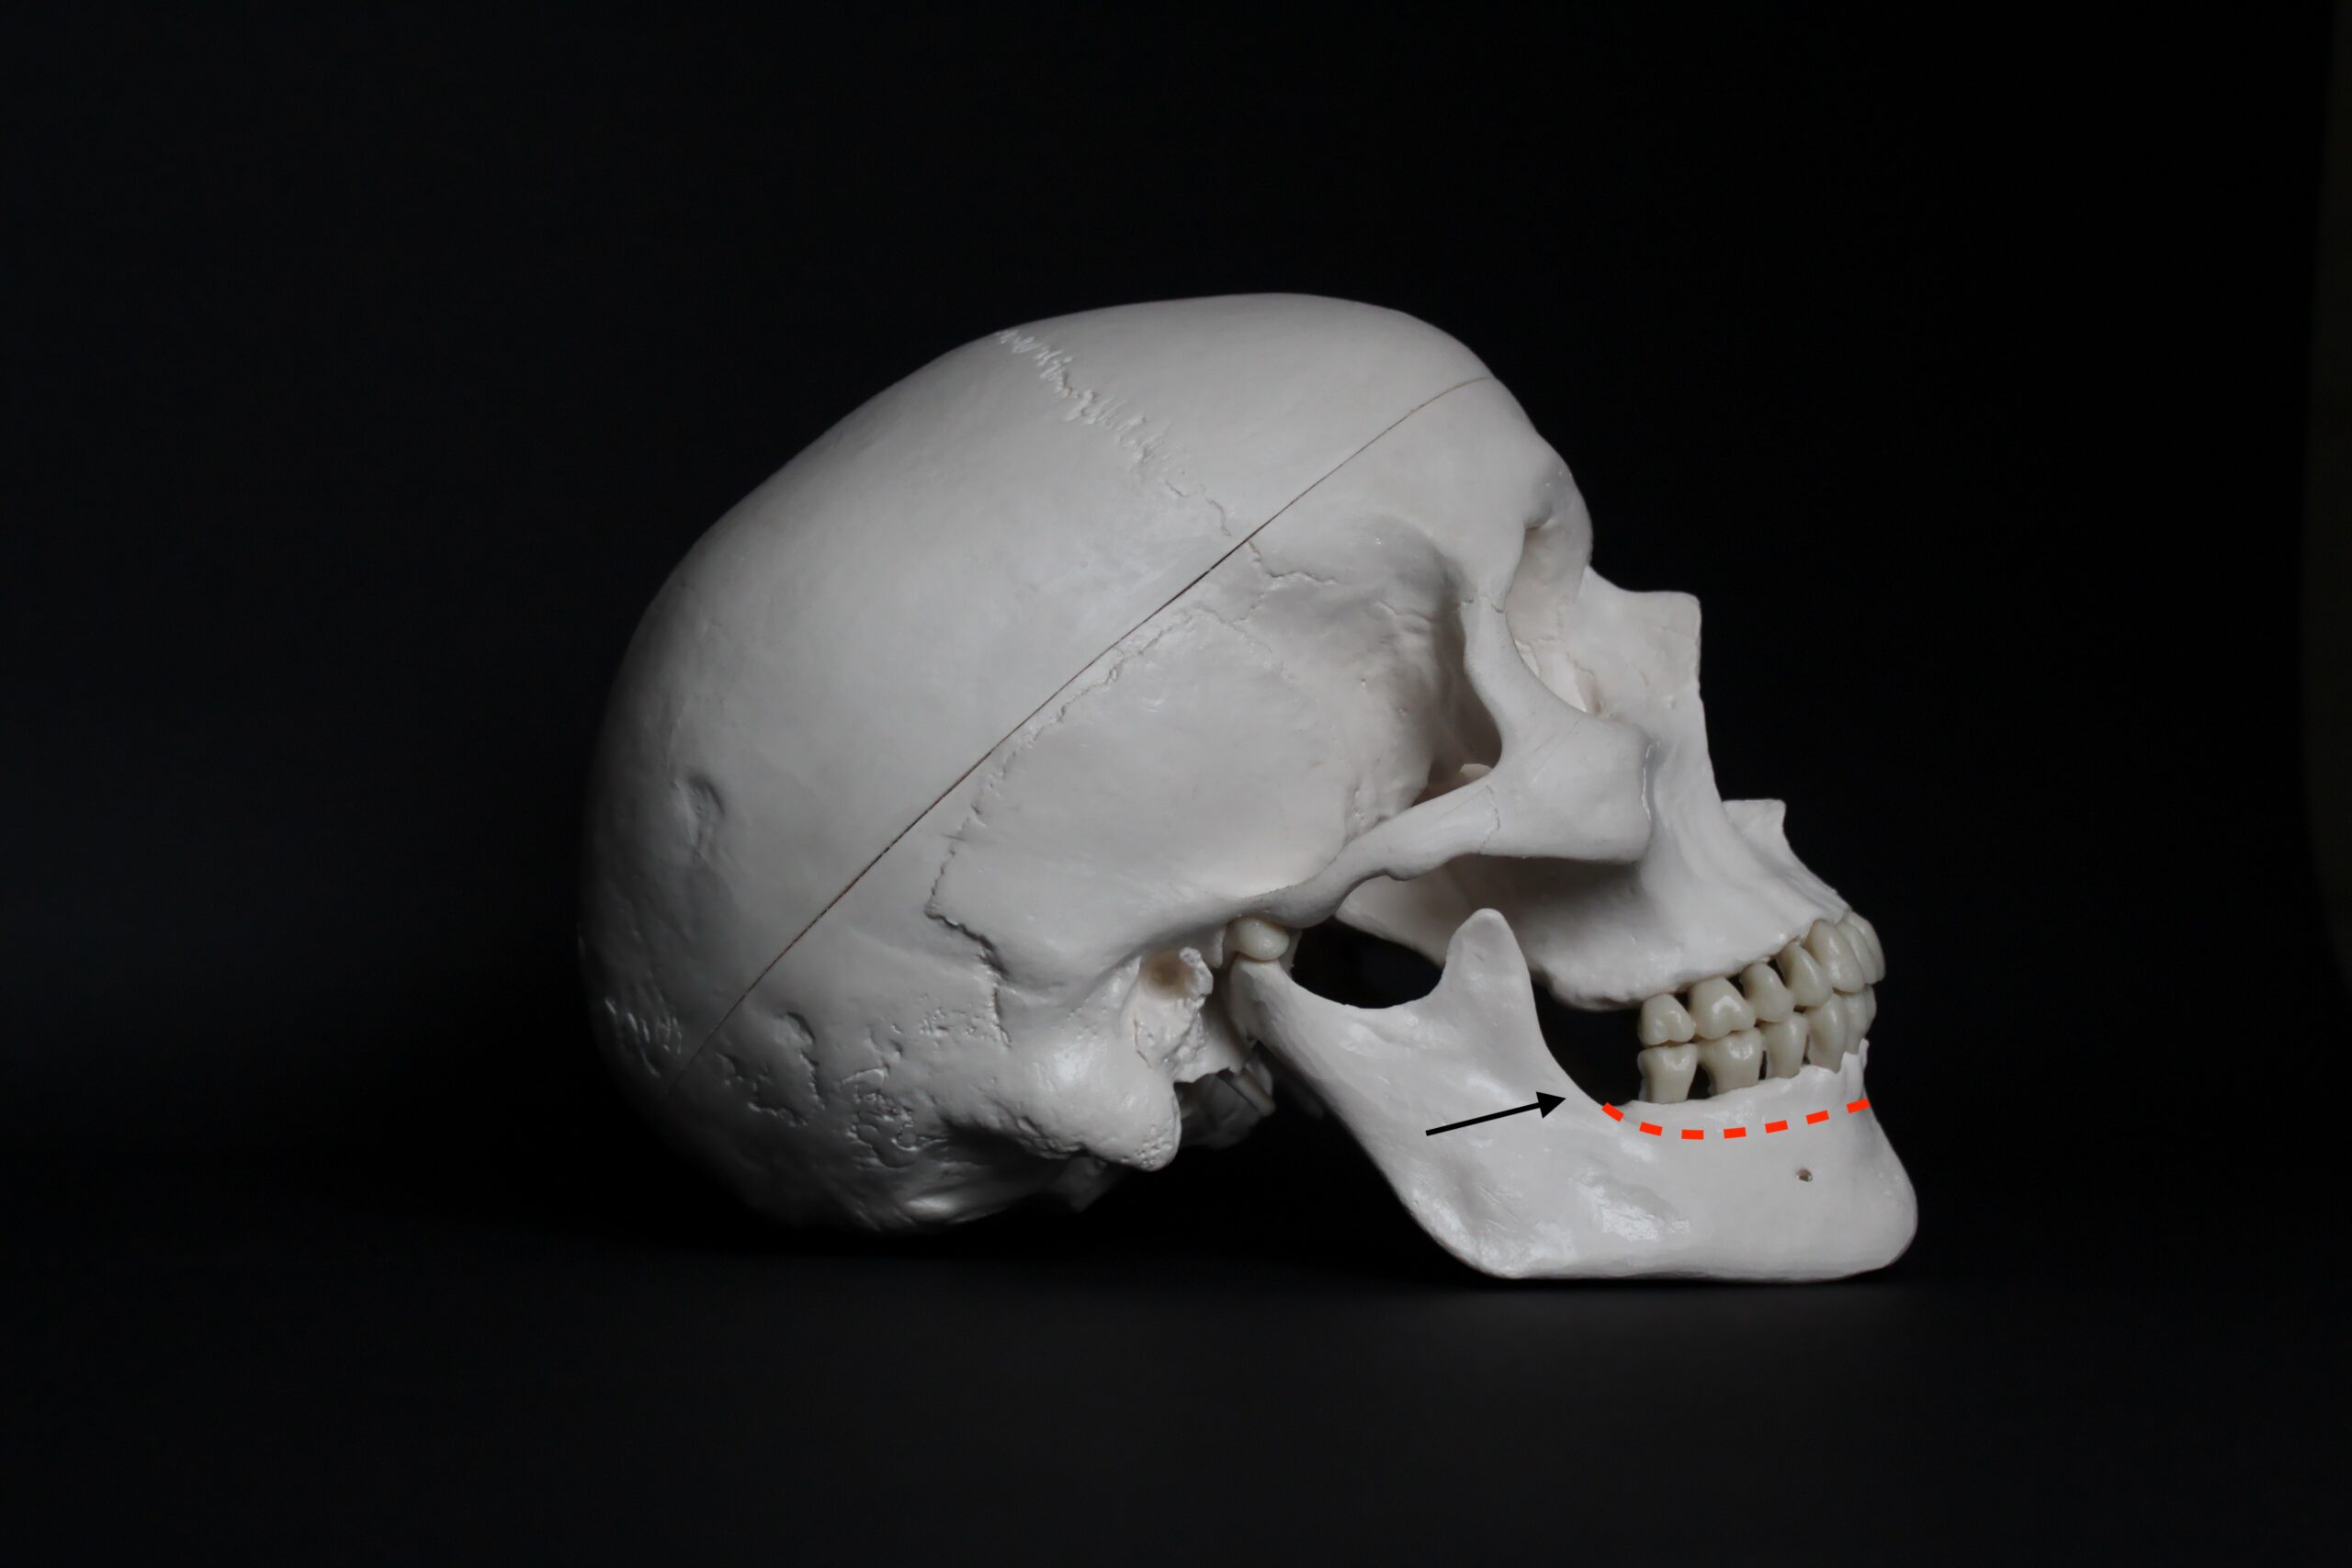
As you gaze back upon the mandible you see an amazingly clear reduction line, seeming to almost pop out at you…the external oblique ridge. It’s always been there staring at you. How did you not notice??
I felt this way too. It had always been there for me…waiting to guide me. But early on, somehow I overlooked it. Finally I gave in and let it lead me. The external oblique ridge hasn’t steered me wrong since.
Now, I simply take a sterilized #2 pencil and draw a line along the external oblique ridge. I then extend this pencil line, at that same height, anteriorly along the mandible. I proceed to complete my reduction to this pencil line – essentially an extension of the external oblique ridge.
This has been adequate reduction in literally every case I have done since initiating this protocol. For reference, I have been using this method since 2022 (approximately 800 arches as of this posting).
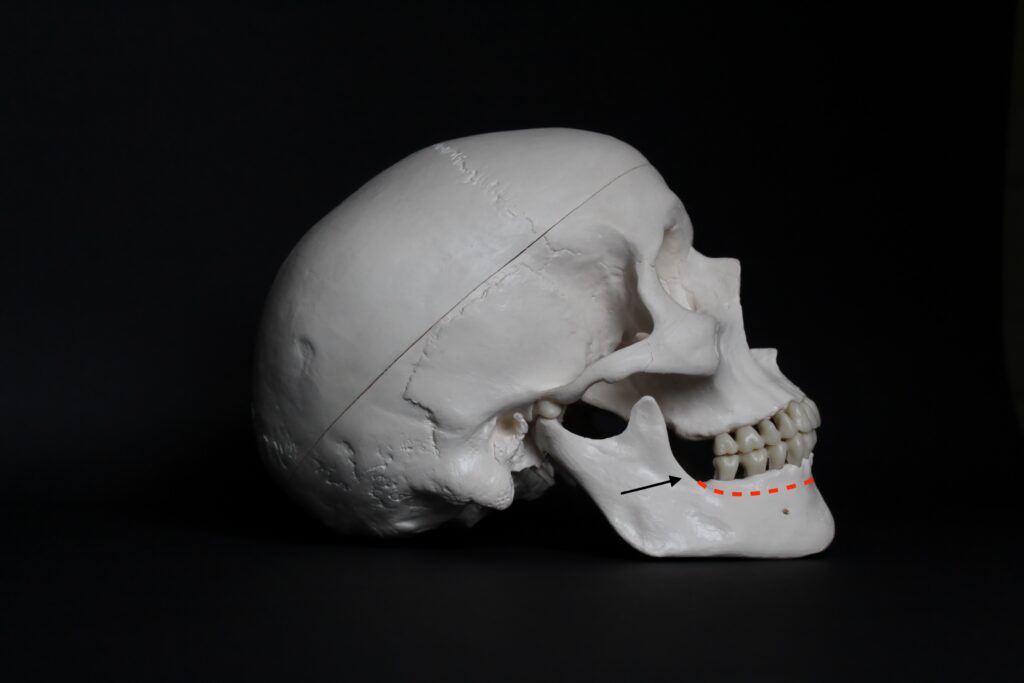
The beautiful thing about using the external oblique ridge as a guide is that it eliminates the most problematic area – the posterior mandible. It ensures adequate reduction in this frequently under reduced anatomic region.
For those of you feeling like you may lose your way as you wander toward the anterior mandible, don’t fret. Here, take your reduction to the bottom of the central incisor socket and this will be adequate virtually every time.
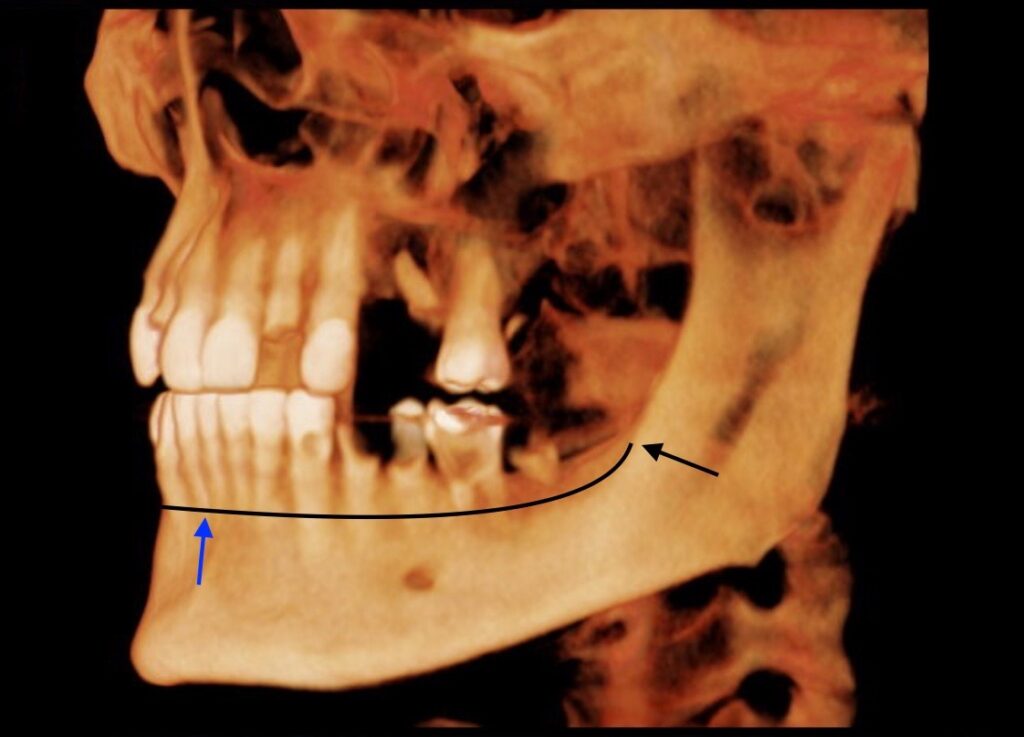
The video below is my drawn reduction line along the external oblique ridge extending to the bottom of the mandibular central incisor socket. The perio probe is used to highlight the 15mm (or more) of planned reduction from the incisal edge of the second pre-molars and central incisor that this technique provides.
15 Comments
Samuel Kang
November 21, 2023Oh dang that’s a game changer reference point. Thanks Matt
Matt Krieger
November 21, 2023Yes I LOVE this technique and it is so helpful intra-operatively!
Sean Lan
January 12, 2024Will try this on my next mandible AOX!
Matt Krieger
January 13, 2024I use it every single case! Let me know what you think!
Ziad Kutob
January 23, 2024Putting the teeth back for reference points! I love it
Matt Krieger
January 24, 2024In my opinion – simply the best way to check your reduction!
Kiefer Schmidt
January 30, 2024Gaining more and more pearls from these blogs. Can’t wait to use this !
Matt Krieger
January 31, 2024Awesome! I’m glad!
This technique is a game changer in my opinion!! Enjoy!
Aman
November 23, 2025The video helped loads. Thanks for showing it this way. Makes total sense now!!
Marcus
April 19, 2024Incredible – what are you using to film your cases?
Matt Krieger
April 19, 2024Hey Marcus,
A combination of:
1. iPhone
2. Sony a7IV with a 90 mm f/2.8 Macro lense
Andy Brito
November 2, 2024Any tips in knowing how close the IAN is after your plasty in the posterior?
Matt
November 3, 2024Yes! Too much to write down here in a response. I have this in the “queue” as well for upcoming content. Great question – thanks!
Mohammed
October 26, 2025How do get such clean surgical field without bleeding? Makes marking easier
Matt
November 16, 2025First off – I definitely have cases that bleed a lot. Not all cases are “clean”. That being said, one of the best ways I feel that I help limit bleeding is taking teeth out first and making the incision second. This gives extra time for the local and epi to sit in the tissue longer and therefore provide a more profound hemostatic effect.