
Mandibular full-arch surgery can, at times, be simple and straightforward. And yet at other times, it can present the most difficult of surgical scenarios. The reason as to why this significant variance exists, is that there are simply not as many “outs” in the mandible.
One scenario that can increase mandibular arch difficulty is the presence of bony defects located at traditional AOX implant sites. When these defects or irregularities are present, it can often be frustrating trying to figure out how to work around or “through” a defect.
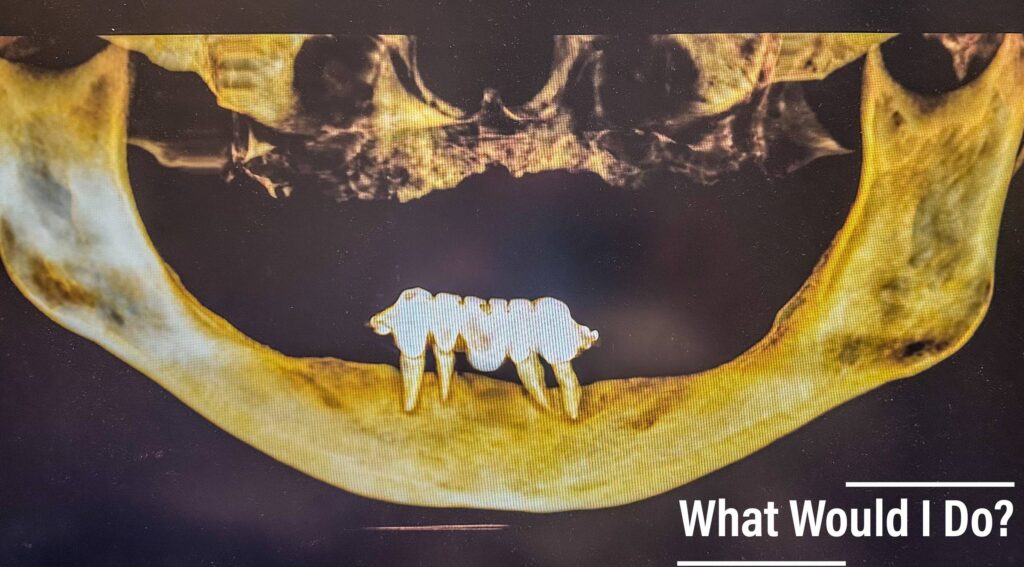
Recently, one such mandibular arch “defect” scenario presented to a colleague of mine at his practice in Chicago. He sent me the pre-operative mandibular arch for review and I was asked how I would treatment plan this arch – with specific emphasis on how I would manage the defect at site #21-23.
I wanted to share my response and thought process with you here today. Please note that the photos shown in this newsletter are provided by my colleague and used with their permission.
I would also like to note that for some of you, this may seem basic and straightforward. For others, this may be new information. My hope is that all readers can learn something – or, at a minimum, review in your mind how and why you would do it differently.
Mandibular Arch Case Presentation
Patient is a 63 y/o Female with a past medical history significant only for 1/2 PPD cigarette use.
This patient is treatment planned for a lower full-arch surgery with a goal of immediate loading and an upper traditional denture.
Imaging:
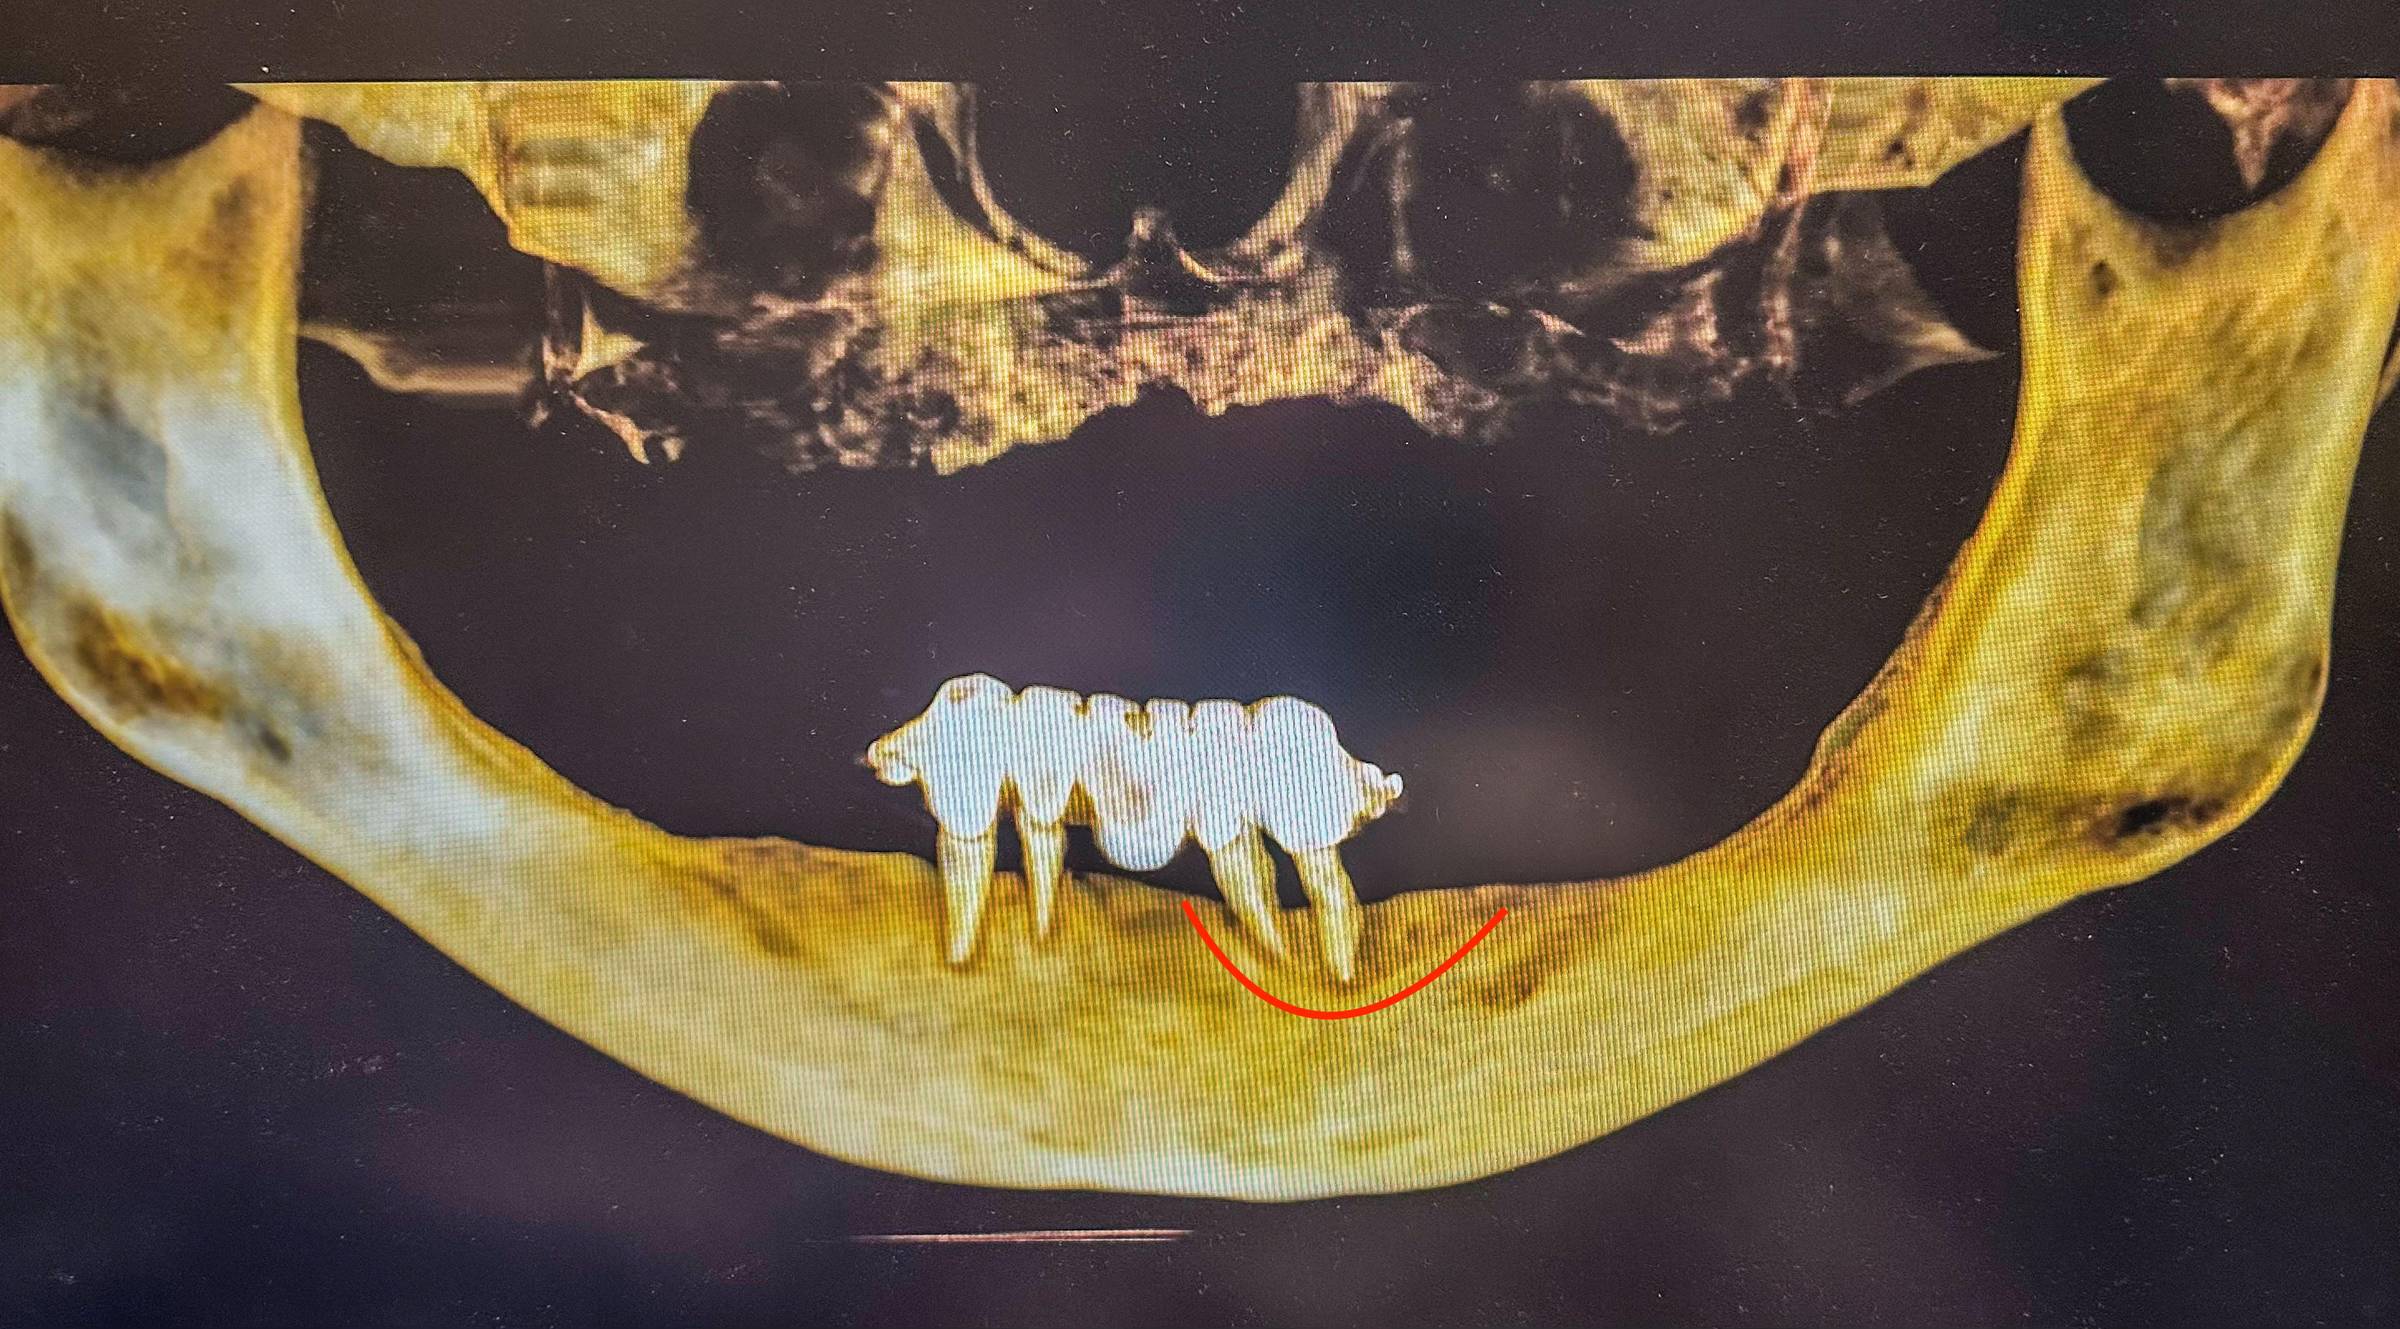
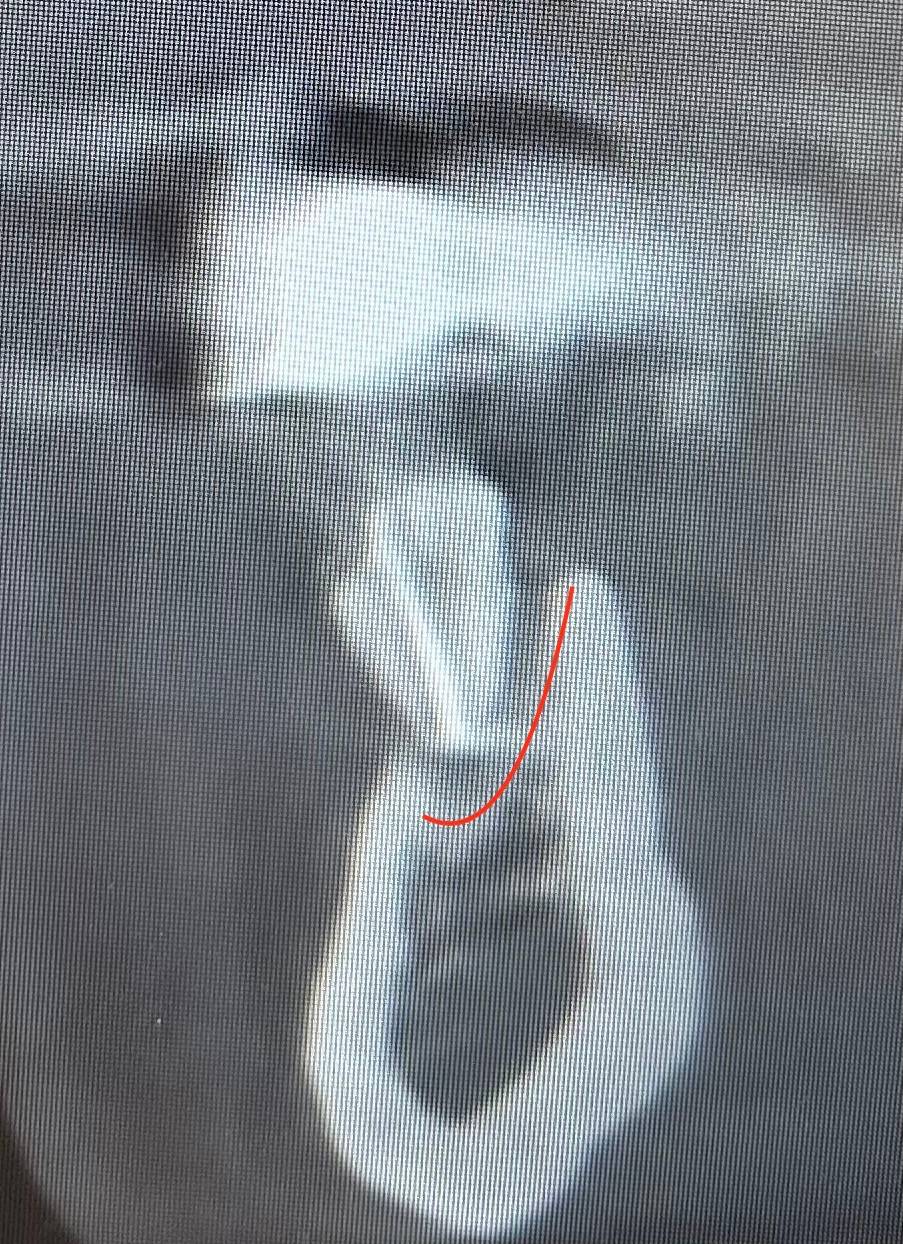
Based on a review of the panorex image and CT scan here’s what we know:
- No additional reduction is “technically” required for prosthetic space due to existing bone loss and atrophy.
- There is approximately 4-5 mm of bone height posterior to the foramen depending on location.
- There is a large periapical defect at site #21-23 with a subsequent knife-edge ridge created at the lingual aspect of this anatomic location.
Here’s how I would handle this case and why:
1. Although alveolar reduction is not “technically” necessary, I would still perform a conservative amount of reduction (only using my barrel bur) to create a smooth flat plane.
I am not doing this to create restorative space. I am performing this reduction to remove inherent bone irregularities and defects around my proposed implant sites.
2. I would place a traditional 4-implant configuration.
Given the anatomical location of this patient’s mandibular foramen a second bicuspid spread/access hole position should be achievable. This A-P spread will create a one tooth or less cantilever on a first molar to first molar prosthetic.
3. I would not place additional implants posterior to the mental foramen.
This patient has minimal bone in the anatomic location posterior to the foramen. While placement of a short implant may be possible (with an implant in the 4-5 mm range), there is an inherent risk of encroachment and/or damage to the inferior alveolar nerve.
Furthermore, with a fixed arch opposing a traditional denture – the “extra-support” of a 6-implant configuration should not be necessary. The risks do not outweigh the benefits.
4. I would avoid the defect at site #21-23 entirely.
Implant #20 would be moved as far distal as possible and placed in healthy bone with an intact bone collar around the implant.
I would use a thinner diameter implant if necessary to ensure that the implant remains in intact, healthy bone and out of the defect site.
I would also shift the “lateral incisor” implant toward the midline to avoid the defect. Remember, we have flexibility in implant position – we do not HAVE TO place the anterior implant exactly at the lateral incisor position.
Proposed Post-Op Image:
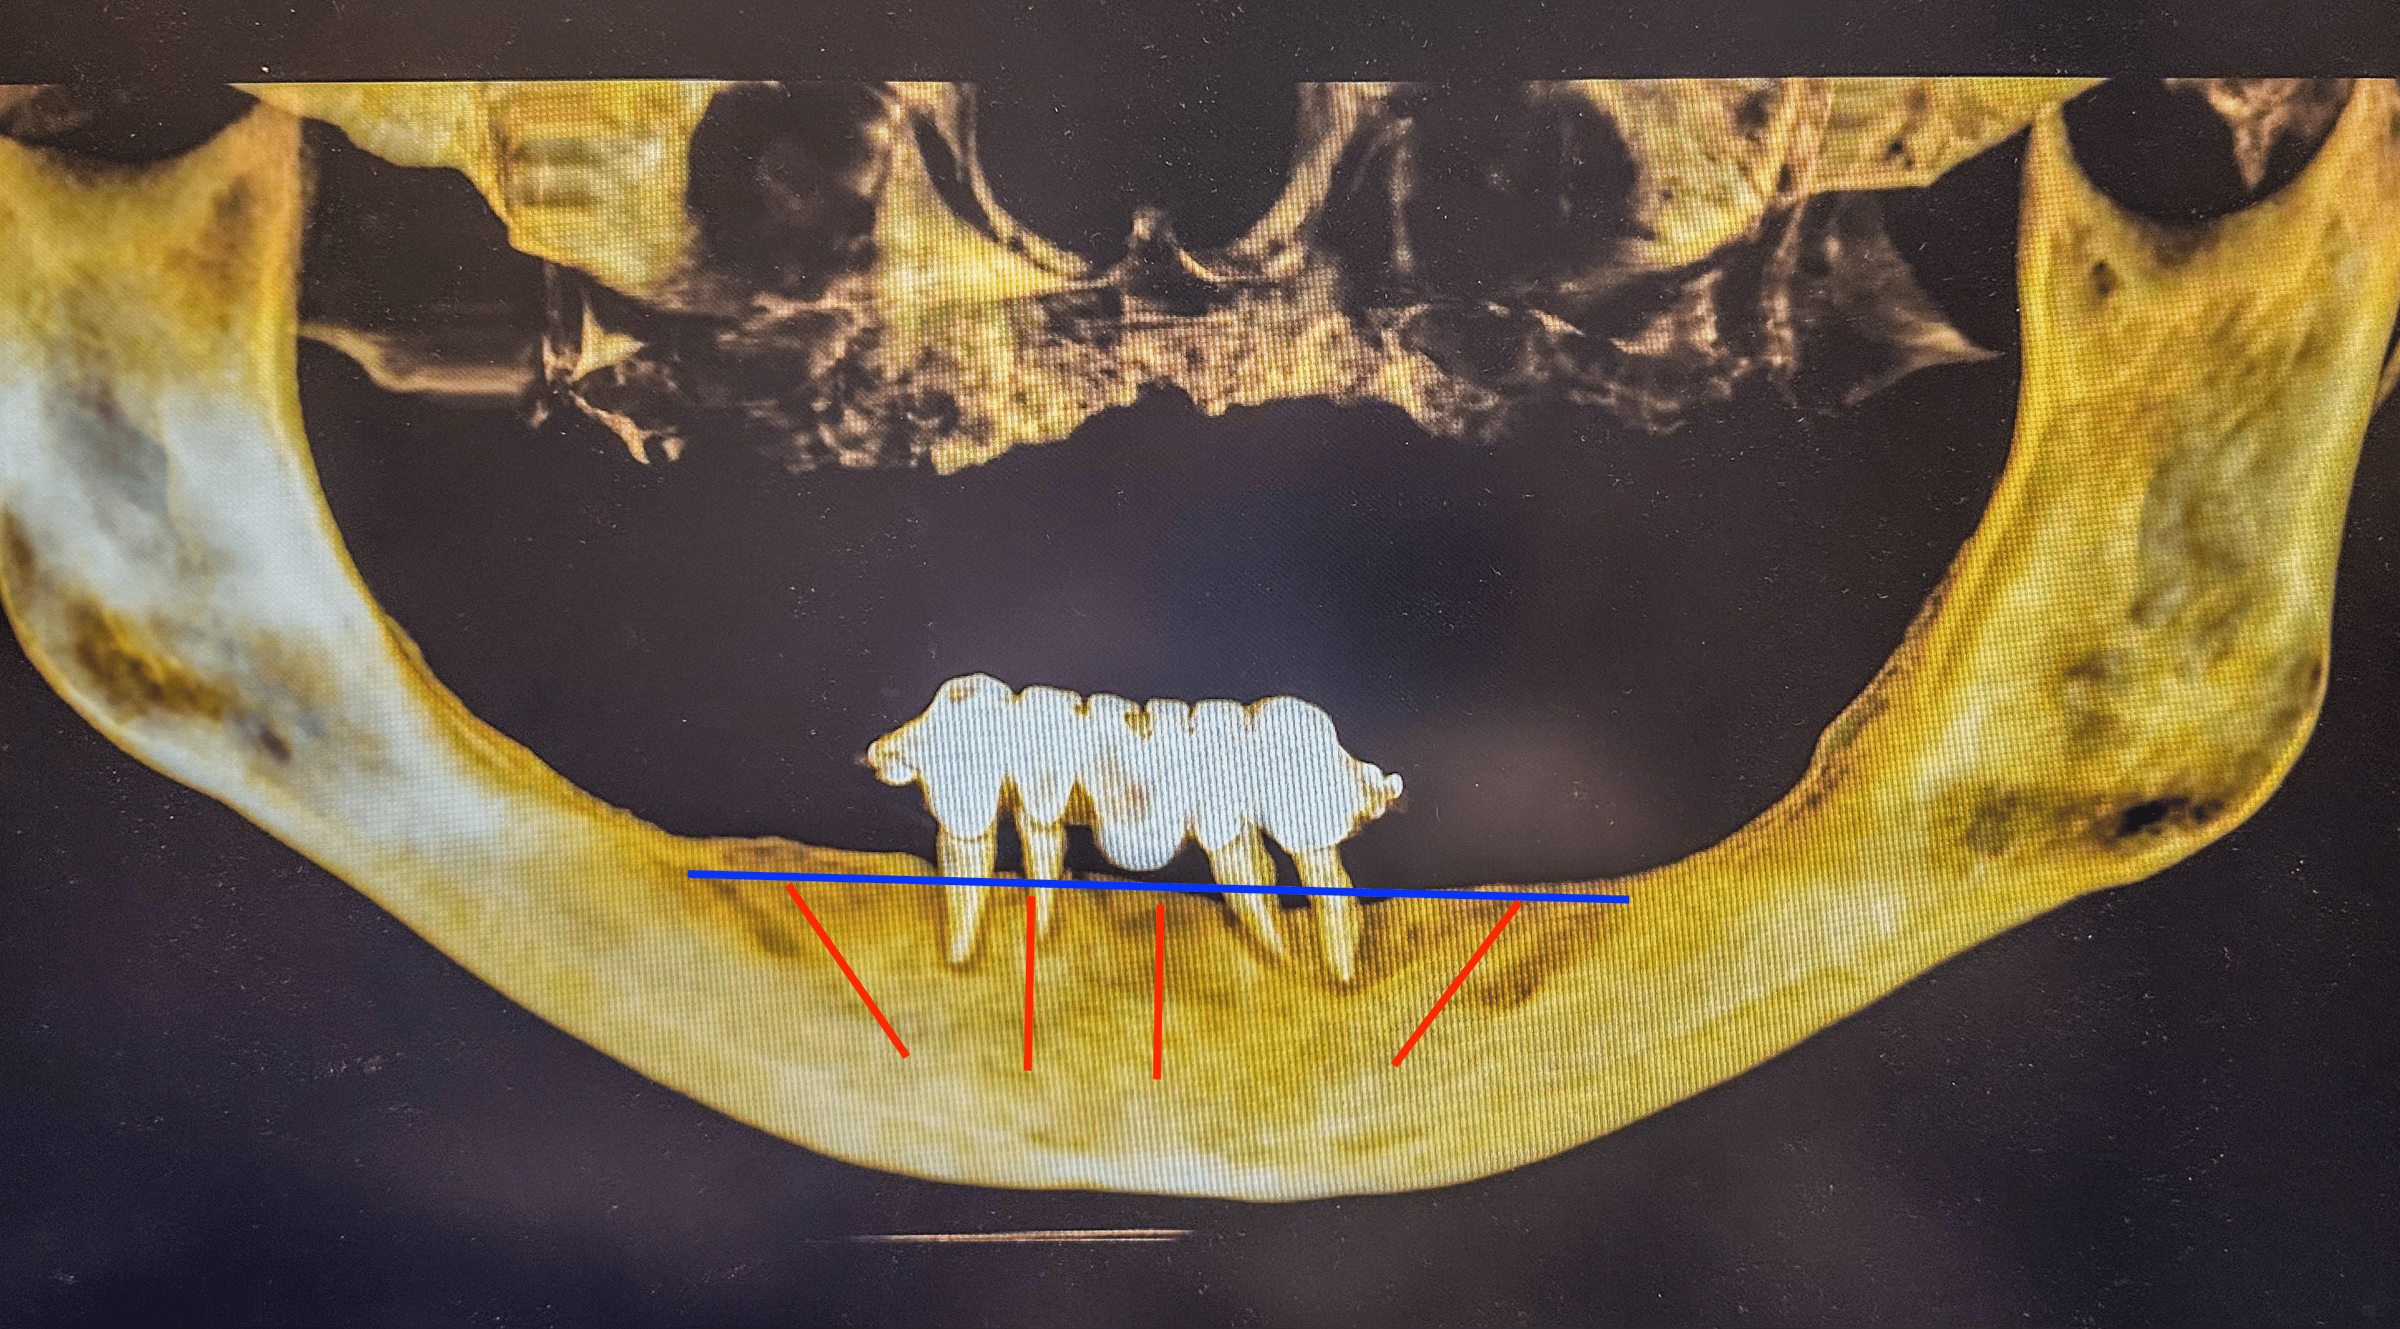
The key to this case is management of the mandibular defect.
Here are some more in depth thoughts on this topic:
While an implant can be placed in a defect site and reliable torque generated, in my experience a one-walled defect as shown is difficult to predictably manage while simultaneously immediately loading an implant at the same site.
While this creates a temporary feeling of success and the ability to immediately load – I have noticed that more often than not the graft at that site will not heal well due to the immediate communication with the oral cavity and the implant/abutment site.
This typically results in a slowly progressing defect at the site of the graft and immediately loaded implant that creates bone loss, peri-implantitis, and or painful symptoms over the next few months or even years.
I have found much more success in carrying out one of the following surgical solutions to a large bony defect:
1. Avoid the defect site altogether with the location of implant placement.
In this scenario you can graft the defect if you wish, or leave it be. Regardless, ensure that you have a strong collar of bone around your implant site and that part of the defect is not exposing implant threads. Meaning, be far enough away from the defect that the defect won’t negatively impact the implant.
2. If I cannot avoid the site, I will place the implant at the site, graft the site with preferably autogenous bone debris, PRF and a collagen membrane (+/- fixating the membrane) and bury the implant / graft.
This provides much more predictable healing and graft retention. In this scenario, depending on the defect location, I will need to find an implant site posterior to the defect to immediately load.
3. There is always the option to stage the procedure, graft the site first, achieve primary closure, and then return in 4 months for a traditional full-arch surgery.
Many of you may agree with this treatment plan.
Many of you may disagree.
Or, some combination of the two.
The point of this case study is not necessarily to perform this surgery exactly how I do.
The key is walking through this surgery and mentally addressing the potential challenges with surgical solutions and a surgical game plan that fits you.
– Always know why you do what you do –
Matthew Krieger DMD
“Plans are nothing; planning is everything.”
Dwight D. Eisenhower